Fitting a roof window into a tiled roof
Fitting a roof window into a tiled roof. What it means in practice on Essex housing stock, and how we approach it.
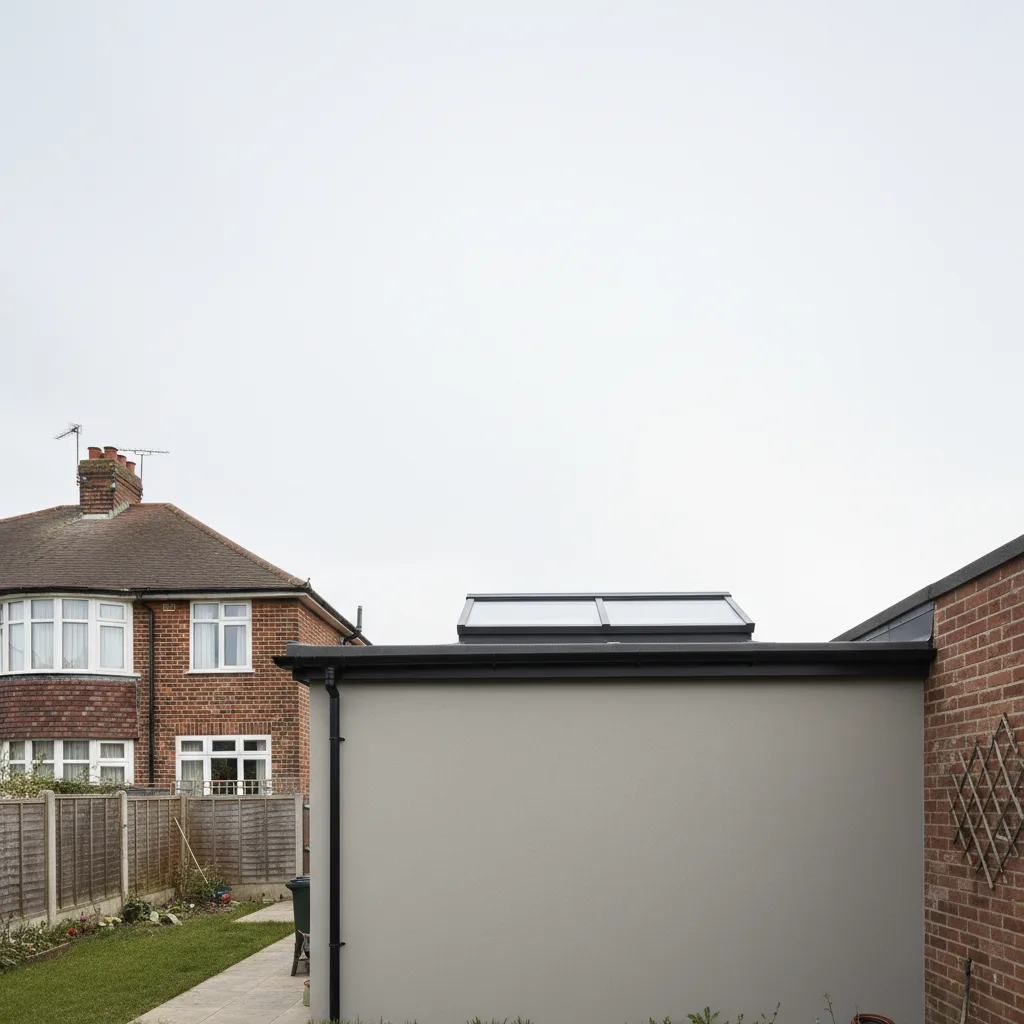
A roof window sits in the plane of a tiled slope rather than proud of it, so the whole job is really an exercise in getting a rectangular metal-framed unit to behave like part of the tile field around it. Water has to run past it as if it were never there. The difference between a window that stays dry for thirty years and one that marks the ceiling is almost never the glass. It is the way the flashing marries into the tile profile, and that starts with reading the roof you already have.
What a tiled roof asks of a roof window
A pitched tiled roof sheds water by overlap. Each course of tiles laps the one below, the battens set the gauge, and underneath it all a felt or membrane carries away anything that gets past the tiles. Drop a window into that system and you interrupt every layer at once: the tiles, the battens, the membrane and often a rafter. The window has to re-close all of them.
That is why a roof window is supplied as a system rather than a single frame. You get the sash and the outer frame, then a flashing kit sized to the tile type, a set of soakers or an apron, and usually an underfelt collar that ties the roofing membrane back to the frame. Fit the frame and skip the collar and you have built a funnel. The parts only work as a set, matched to the covering they are landing in.
Tiled roofs across south Essex fall into a few clear families, and each one wants a different flashing. The clay plain tiles on Victorian and Edwardian villas along the Leigh and Westcliff cliff top are small, flat and laid to a tight gauge. The concrete interlocking tiles on the vast 1930s semi belt are larger, profiled and quick to strip and relay. Pantiles turn up on older and rural stock towards Rochford and Maldon, with a deep S-curve that needs the most generous flashing of all. Read the tile first, because it decides the kit, the labour and how the finished window will look from the garden.
Reading your tile: profile, gauge and the flashing that fits it
The flashing kit is chosen by tile profile, not by brand. Get this wrong and no amount of care on installation day will save it, because the metal simply will not sit down onto the tile surface. There are two broad families of flashing, and a couple of specials.
A recessed flashing is for flat or low-profile coverings: slate, clay plain tiles, and thin concrete plain tiles. It lets the window sit lower in the roof, almost in the plane of the tiles, which is the neatest look and the one conservation officers prefer. A deep or profiled flashing is for tiles with a pronounced contour: standard concrete interlocking tiles and pantiles. It stands the frame up a little higher so the metal can bridge the peaks and valleys of the tile without leaving a gap water can track through.
| Covering | Typical profile | Flashing type | Where you see it locally |
|---|---|---|---|
| Natural or fibre-cement slate | Flat, thin | Recessed | Older cliff-top and estate roofs |
| Clay plain tile | Flat, small unit | Recessed | Victorian and Edwardian villas |
| Concrete plain tile | Flat, thicker | Recessed or standard | Post-war and later replacements |
| Concrete interlocking tile | Low to medium contour | Deep or profiled | 1930s semis, most estate housing |
| Clay or concrete pantile | Deep S-curve | Deep profiled | Rochford and Maldon village stock |
| Any tile below 15 degrees | Shallow pitch | Low-pitch kit plus extra underfelt | Shallow rear-extension slopes |
Gauge matters as well as profile. The gauge is the exposed length of each tile course, and it sets how the tiles above and below the window will land against the flashing. A window height is chosen partly so that the top and bottom flashings meet a tile course cleanly rather than cutting a course to an awkward sliver. On a plain-tile roof with a short gauge there is a lot of freedom. On a large interlocking tile with a long gauge there is less, and it is worth measuring the coursing before ordering a height, not after.
Choosing the size and where it lands between the rafters
Roof windows come in a set ladder of standard sizes, quoted as width by height in centimetres. You pick from the ladder rather than ordering any dimension you like, because the frames are tooled to those sizes and so are the flashings. These are the sizes you will meet most often.
| Width x height (cm) | Rough glazed feel | Common use |
|---|---|---|
| 55 x 78 | Small | Landings, ensuites, box rooms |
| 55 x 98 | Small to medium | Single window in a narrow rafter bay |
| 66 x 118 | Medium | Bedrooms, studies |
| 78 x 98 | Medium | The default loft-room window |
| 78 x 118 | Medium to large | Main loft bedrooms |
| 94 x 118 | Large | Living space, paired installs |
| 114 x 118 | Wide | Wide rafter spacing, feature windows |
The width is the constraint that catches people out. A roof window has to fit between two rafters, and most pitched roofs are built with rafters at 400mm or 600mm centres. A 55cm or 66cm wide window usually drops between rafters spaced at 600mm with only the battens and a trimmer to deal with. Go wider than the rafter spacing and you have to cut a rafter and build a structural opening, which is a bigger job and a Building Regulations matter. So the honest first question on a tiled roof is not what size you want, it is how far apart your rafters are and whether the size you want spans one of them.
Height gives you more freedom because you are cutting across battens, which are easy to trim and refit, rather than across rafters. There is a comfort rule worth knowing: the top of the window wants to be high enough to see out of standing up, and the bottom low enough to see out of sitting down. A window bottom around 900mm to 1100mm above the finished floor, with the head above 2 metres, tends to work for both. On a shallow pitch you fit a taller window to get the same head height, because a low slope needs more length to reach the same point up the wall.
Pitch, and why the slope decides the flashing kit
Every roof window carries a minimum pitch, and most standard units are rated from about 15 degrees up to somewhere around 90. Between roughly 20 and 65 degrees, which covers the great majority of tiled house roofs in this part of Essex, a standard flashing does the job with no fuss. Below 15 degrees you move into low-pitch territory, where you need a dedicated low-pitch flashing and extra underfelt because water moves so slowly across the glass and the surround that ordinary detailing is not enough to keep it out.
Pitch also changes how the window behaves once it is in. On a steep Victorian roof of 45 degrees or more, rain runs off the glass fast and the window drains cleanly, but the sash is close to vertical so the room gains less overhead light than you might expect. On a shallow 1930s rear slope of 25 to 30 degrees, the glass faces more towards the sky, which brings more light and, on the wrong aspect, a good deal more heat. That is the point where the direction the slope faces stops being a detail and starts being the whole decision.
The opening: rafters, trimming and structural work
Once the size and position are set, the opening gets formed from the inside and the outside together. The sequence on a standard between-the-rafters install runs roughly like this.
- Mark the window position inside against the rafters, allowing the fitting clearance the manufacturer specifies around the frame, usually a few centimetres each side.
- From outside, strip the tiles back well clear of the opening, lift them off in courses and stack them to relay, and pull the battens in the zone of the window.
- Cut the roofing membrane and fold it back, ready to be tied into the frame collar rather than trimmed off flush.
- If the window is no wider than the rafter gap, fit horizontal timber trimmers top and bottom between the rafters to carry the frame. If it is wider, a rafter is cut and the load is carried on trimmers and doubled-up rafters either side, which is the structural version of the job.
- Fasten the frame brackets to the rafters or trimmers, set the frame square in the opening and check it sits parallel to the tile courses, because a frame that is out of line with the coursing will show from the garden for the life of the roof.
The structural distinction is the one that decides how big the job is. Cutting a rafter transfers load, so the trimming has to be sized properly and it becomes part of the Building Regulations notification. It is not a job to improvise. If your survey shows the size you want will cut a rafter, that is a design decision to take deliberately, with the timber sizes worked out, not a surprise to discover halfway through a Saturday. On loft conversions the roof structure is often being altered anyway, which is the natural moment to place larger windows where they span a rafter.
Flashings, soakers and the watertight detail
With the frame secured, the roof gets closed back around it, and this is where a dry window is won or lost. The work goes on in a strict order, from the bottom up, because that is the direction water runs.
The underfelt collar goes on first, tying the roofing membrane you folded back earlier onto the frame so any water reaching the membrane layer is carried out over the tiles below the window rather than into the room. Battens are refitted up to the frame. Then the flashing is built: an apron across the bottom that laps over the tiles below, soakers or side flashings up each side that interleave with the tile courses so each piece laps the one beneath it, and a top flashing that tucks under the tiles above and sheds water out to the sides. The stripped tiles are relaid course by course, cut where they meet the frame so they die neatly into the metal.
Two details separate a tidy job from a leak waiting to happen. The side soakers must interleave with the tiles, not sit on top of them, so that water on the tile surface always has a piece of metal or tile beneath it, never a joint it can run into. And the top flashing must go under the course above, never sit on top of it, because anything lapped the wrong way funnels water inwards at the exact point you least want it. Done properly, the finished window looks like it grew there, the tiles run up to it and past it, and from the garden the eye reads the roof before it reads the window.
The south-facing question: glass for a tiled slope
Here is where a tiled-roof window stops being a joinery job and becomes a light job. Southend faces south across the Thames Estuary, and a very large share of the tiled rear slopes and loft pitches across south Essex face somewhere between south-east and south-west. A window in a south-facing tiled slope at 30 degrees is pointing much of its glass straight at the summer sun, and the flashing that keeps it dry does nothing at all about the heat that pours through it on a July afternoon.
Two numbers describe what the glass does. The U-value governs winter heat loss, and any decent modern unit sits comfortably inside what the regulations demand. The G-value, the solar factor, is the proportion of the sun’s energy the glass lets through as heat, and it is the number that decides whether a south-facing loft bedroom is usable in August. Clear double glazing runs a G-value around 0.6, so roughly sixty per cent of the sun’s energy comes through. Solar-control glass brings that down towards 0.3 or below, turning off more than half the heat, while keeping the room bright. On a north-facing slope you want the opposite: clear glass and all the daylight you can get, because there is no direct sun to control.
Glare belongs in the same conversation. A roof window in a south slope throws a hard pool of light that moves across the room through the afternoon, straight onto a screen or a worktop. Solar-control glass cuts the intensity of that pool as well as the heat behind it. This is the wedge the whole business is built on: specify the glass for the aspect of the slope, not just the size of the hole. A window on a shady north pitch and a window on a bright south pitch of the same roof should not have the same glass in them, and choosing energy-efficient solar-control glazing for the sunny slopes is how a tiled-roof window stays comfortable rather than turning a loft into a greenhouse. The physics does not change because the roof is tiled rather than flat.
Regulations, notification and getting it right first time
A new or enlarged roof window is notifiable under Building Regulations. Part L covers the thermal performance, so the U-value of the unit has to meet the limit for a replacement or new rooflight in a dwelling. Part K covers safety glazing, which is why overhead glass uses a laminated inner pane. Where a rafter is cut, the structural trimming comes into it too. Someone has to notify Building Control, and on a straightforward between-the-rafters install that is a formality, but it still has to be done and signed off.
Rooflights and roof windows are generally permitted development on a house, as long as they project no more than 150mm beyond the plane of the roof and sit below the ridge, with obscure glazing and restricted opening where they face a side elevation below 1.7 metres. That is why a roof window that sits flush in a tiled slope, which by its nature barely stands proud of the tiles, usually needs no planning application. The exceptions are the ones to check before ordering anything: flats and maisonettes, listed buildings, and conservation areas. The Leigh Cliff and Leigh conservation areas carry an Article 4 Direction that removes permitted-development rights for changes to roofing materials and windows, so a window in a tiled roof there needs a planning application where the same window a street away would not. Always treat this as general guidance and check with Southend-on-Sea City Council, or the relevant authority for your address, before committing.
None of the detail on this page is a reason to be nervous about the job. A roof window in a sound tiled slope is a well-understood installation with a long service life when the flashing is matched to the tile and the glass is matched to the aspect. It is one of the family of jobs covered on our pitched roof skylight installation page, and it shares its detailing with a standard roof window installation. If your slope faces the sun, read the note on solar-control glazing before you settle on the glass, and if you want the flashing type, the size and the G-value worked out for your own roof, ask us for a specification that names all three.
Related reading
Roof pitch and what it means for a roof window
Roof pitch and what it means for a roof window. What it means in practice on Essex housing stock, and…
What roof pitch do I need for a roof window?
What roof pitch do I need for a roof window? The short answer, then the detail that actually matters.
How much does a pitched roof skylight cost?
How much does a pitched roof skylight cost? The short answer, then the detail that actually matters.
Do you need planning permission for a roof window?
Do you need planning permission for a roof window? The short answer, then the detail that actually matters.
Slate roofs and flashing kits explained
Slate roofs and flashing kits explained. What it means in practice on Essex housing stock, and how we approach it.
Can you fit a roof window without removing tiles?
Can you fit a roof window without removing tiles? The short answer, then the detail that actually matters.