Flat rooflights on a warm roof build-up
Flat rooflights on a warm roof build-up. What it means in practice on Essex housing stock, and how we approach it.
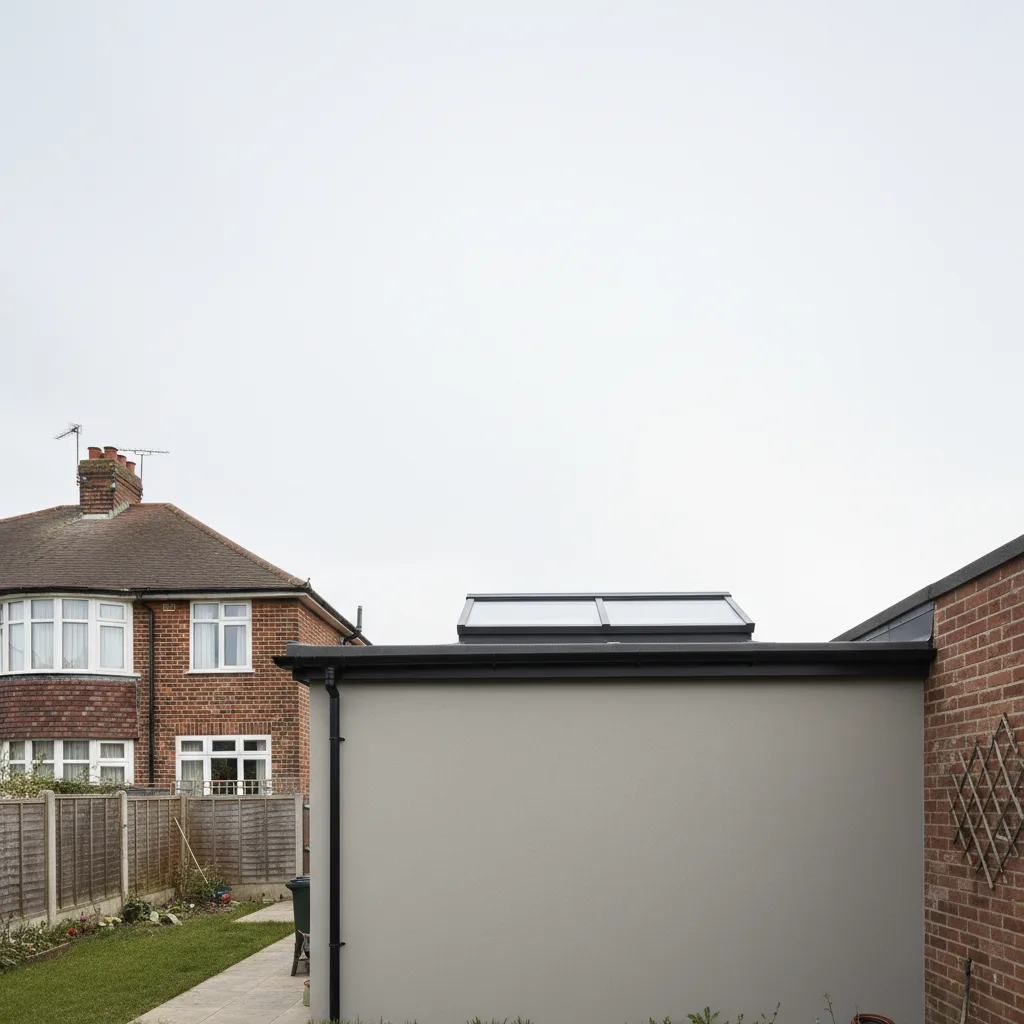
A flat rooflight is only as good as the roof it sits in. Get the build-up wrong and the best glass on the market will still stream with condensation, cost you heat every winter, and leave a cold shadow of black mould creeping around the reveal. Almost all modern flat roofs are now built as warm roofs, and fitting a rooflight into one is a specific detail with specific rules. This is how the layers stack up, where the rooflight meets them, and the two junctions that decide whether the whole thing performs or slowly fails.
Cold roof, warm roof, and why the warm roof won
For decades a flat roof was built cold. The insulation went between the timber joists, under the deck, and a ventilated air gap was left above it so that any moisture finding its way up could be carried off by cross-ventilation at the eaves. It worked on paper. In practice the ventilation path was easily blocked, the insulation depth was limited by the joist depth, and the cold deck sitting above a warm room was a reliable place for water vapour to condense. Interstitial condensation, rotting the deck from inside where nobody could see it, is the classic failure of the cold flat roof.
The warm roof turns the section upside down. Instead of sitting the insulation below the deck, you lay it on top: rigid boards over the structural deck, with the waterproofing membrane over the boards. Now the deck and the joists are on the warm side of the insulation, held at close to room temperature, so vapour never reaches a surface cold enough to condense on. There is no void to ventilate and nothing hidden to rot. It is warmer, it is more forgiving, and it is what current guidance and most manufacturers assume you are building. When we install a flat-roof skylight into a new or re-covered roof, this is the section we are working with.
You will also hear about the inverted or “upside-down” warm roof, where the insulation goes above the waterproofing and is weighted down with ballast or paving. It is a commercial and terrace detail more than a domestic extension one, and rooflights sit in it differently again. For the rear extensions and loft-lit rooms across south Essex, the standard warm roof is what you will almost always meet, so that is what this guide follows.
The layers of a warm flat roof, from deck to membrane
A warm flat roof is a sandwich, and the order of the layers is not negotiable. From the bottom up:
| Layer | Typical material | Typical thickness | What it does |
|---|---|---|---|
| Structural deck | 18mm WBP plywood or OSB3 on timber joists | 18mm | Carries the load and gives a flat, screwable base |
| Vapour control layer | Self-adhesive bituminous membrane or polyethylene sheet | About 1mm | Stops warm, moist room air passing up into the insulation |
| Rigid insulation | PIR or PUR board, flat or tapered | 100mm to 150mm | Does the thermal work and keeps the deck warm |
| Waterproofing | Single-ply membrane, GRP, EPDM or high-performance felt | 1.5mm to 3mm | Keeps water out and takes the weather |
The vapour control layer is the quiet one that people forget, and it is the layer that most often decides whether a rooflight detail lasts. Its job is to keep humid indoor air, which a kitchen and a bathroom produce in quantity, from reaching the cold outer face of the insulation. Miss it, tear it, or fail to seal it around a penetration, and you have handed the roof the exact problem the warm build-up was meant to solve.
The insulation is where the U-value comes from, and rigid PIR board is the usual choice because it delivers the lowest thermal conductivity per millimetre, which matters when every millimetre of extra height has to be flashed and finished. Some roofs use tapered insulation, boards cut to a falls pattern at the factory, to build the drainage gradient into the insulation itself rather than relying on firrings under the deck.
How the rooflight meets the roof: the upstand and kerb
A flat rooflight is never bedded straight onto the flat surface of the roof. It sits on an upstand, also called a kerb, which is a raised frame built up around the opening so that the glass unit stands proud of the finished waterproofing. This is not a style choice. Water lies on a flat roof, especially in the minutes after heavy rain and around any obstruction, and the glass has to sit above that water line with a clear margin.
The working rule is that the top of the finished upstand, where the waterproofing turns up and the rooflight frame beds down, should stand at least 150mm above the finished roof surface. On a roof with a shallow fall or a known ponding spot, more is sensible. Go lower to make the rooflight look sleeker from the garden and you are inviting standing water to find the one horizontal joint you cannot afford it to find.
There are three ways the upstand itself gets built:
- A timber upstand built up in situ from treated softwood, then insulated on its outer faces and dressed with the waterproofing. Flexible, cheap, and only as good as the insulation and detailing wrapped around it.
- A proprietary insulated kerb supplied as a rigid, pre-insulated box that drops onto the trimmed opening. It carries its own thermal break, which takes the guesswork out of the cold-bridge problem below.
- A builder’s kerb that the glass unit is designed to sit on, where the manufacturer specifies the exact upstand dimensions their frame expects. Flat glass rooflights and lantern bases both come with a schedule of the kerb they need, and the roof has to be built to it.
Whichever route, the sequence through the layers is the point. The vapour control layer has to be carried up the inside of the upstand and sealed to the frame. The insulation has to continue up the outside of the upstand so the thermal line is unbroken. The waterproofing dresses up and over the top. Skip a step, or let one layer stop short at the base of the kerb, and you have built a fault into a roof that will not show itself until the first cold, wet week of the year.
The two ways a warm roof detail goes wrong
Nearly every problem with a rooflight in a warm roof traces back to one of two junctions. Both are at the upstand, and both are invisible once the job is finished.
The thermal bridge
The insulation across the field of the roof is a continuous, unbroken layer. The rooflight opening interrupts it. If the upstand around that opening is bare timber or an uninsulated frame, you have driven a cold bridge straight through the warm envelope: a strip of the structure that stays close to outside temperature and pulls heat out around the whole perimeter of the rooflight. On a cold night the inside face of that reveal drops well below the temperature of the wall around it. Warm room air touching a cold surface gives up its moisture, and the first thing you see is condensation beading on the plasterboard reveal, followed in a few weeks by mould in the corners. People blame the glass. The glass is usually innocent. The reveal is the culprit, and the cure is to insulate the sides of the upstand so the thermal line runs unbroken from the roof field, up the kerb, and hard against the rooflight frame.
The vapour path
The second failure is the vapour control layer stopping short. If the VCL is laid neatly across the deck but not turned up the upstand and sealed to the frame, humid air from the room below has an open route into the insulation zone at exactly the coldest, most exposed part of the roof. It condenses inside the build-up, wets the insulation, and over a couple of winters the thermal performance you paid for quietly drains away while the deck below stays damp. A warm roof only works if its vapour barrier is continuous, and the rooflight is the one place where continuity is most often broken. Sealing the VCL to the rooflight kerb is a five-minute job that saves a roof.
Neither of these shows up on a fine day in June. They show up in December, which is why they get missed by anyone quoting on looks and speed rather than section.
Falls, drainage and choosing the rooflight type
A flat roof is never truly flat. It is laid to a fall so that water runs off rather than sitting, and current guidance is to design to a finished fall of 1:40 to be confident of achieving at least 1:80 once deflection and workmanship are accounted for. That gradient matters around a rooflight, because the upstand is an obstruction that water has to get around. Set the rooflight so that water sheds past it, not into a dammed pocket on the up-slope side.
The glass unit itself comes in a few forms, and the choice interacts with the flat build-up:
- Flat glass rooflights sit level or to a very slight self-draining pitch, usually around 5 degrees built into the frame, so rain runs off rather than pooling and drying to a dirty tide mark. They give the cleanest modern look on an extension roof.
- Domed or pitched units shed water naturally by their shape and suit roofs where the fall is minimal.
- A roof lantern raises a pitched glazed structure on the flat roof for height and drama over a kitchen or dining space, and needs its own kerb and structural allowance.
Whatever the type, cutting the opening means trimming the deck and usually doubling the joists around it to carry the load the removed section used to. That is structural work, and the size of the rooflight is limited by the joist span as much as by taste. A run of smaller units can bring in as much light as one large pane while keeping the structure straightforward. The full picture of sizing, structure and installation sits on our flat-roof skylight installation page.
Hitting the U-value on both the roof and the glass
Two separate U-values are in play, and Building Control looks at both. The roof field has one, set by the insulation thickness. The rooflight has its own, set by the glazing. New and enlarged rooflights are notifiable under the Building Regulations, and we make that notification to Southend-on-Sea City Council or the relevant local authority as part of the work.
For the roof itself, PIR insulation thickness maps roughly to these whole-element figures:
| PIR insulation thickness | Approximate roof U-value (W/m²K) | Notes |
|---|---|---|
| 100mm | 0.18 | Around the target for a new flat roof on an extension |
| 120mm | 0.15 | Comfortable margin, common specification |
| 150mm | 0.13 | Low-energy build, worth it under a large glazed area |
The rooflight glass is the weak point in the whole roof, thermally, because glazing will never match 150mm of insulation. A double-glazed rooflight runs from about 1.6 W/m²K for a basic air-filled unit down to around 1.1 for a good argon-filled, solar-control double, and a triple can reach roughly 0.8. Part L sets a limiting U-value that any replacement or new rooflight has to beat, and any unit worth buying clears it with room to spare. But the U-value is only half of what the glass has to answer for on a flat roof, and on a south-facing one it is the lesser half.
A flat rooflight faces the sky: the solar-gain question
Here is the reason the glass specification matters more in a flat roof than almost anywhere else on the building. A vertical window faces sideways. A pitched-roof window faces a slope. A flat rooflight faces straight up, presenting its full area to the sky and to a high summer sun. It also sees the entire dome of the sky at once, so it collects diffuse light from every direction, not just the half a wall window can see. Of all the ways to glaze a room, a flat rooflight over a south-facing space is the most efficient solar collector you can build, and in July that is not a compliment.
The number that governs this is the G-value, the fraction of the sun’s energy that the glass lets through as heat. Clear double glazing sits around 0.6, which means well over half of the energy landing on the pane arrives in the room below. A solar-control glass brings that down to about 0.3 without turning the room dark, because a good coating rejects the invisible near-infrared that carries the heat while passing the visible light your eye actually wants. On a flat unit facing the sky, that difference is the gap between a bright, usable room and a kitchen nobody will sit in on a hot afternoon.
This is the whole reason we specify the glass before we specify the unit, and it is why a flat rooflight over a south-facing extension in Southend, where the coast faces south across the estuary and the roofs collect through more sunlight hours than most of England, gets solar-control glazing as a matter of course. The U-value keeps the winter heat in. The G-value keeps the summer heat out. On a flat roof pointed at the sky, leaving the second number off the quote is leaving out the number you will feel most.

What to check before the deck is cut
Once the opening is trimmed and the boards are down, the detail is buried and hard to put right. A few questions settled beforehand save all of it:
- Is the upstand insulated on its outer faces? This is the thermal-bridge fix. If the answer is a bare timber kerb, ask how the cold bridge is being broken.
- Does the vapour control layer carry up the upstand and seal to the frame? Continuity here is what keeps condensation out of the build-up.
- How high does the frame sit above the finished waterproofing? You are looking for at least 150mm, more on a shallow fall.
- Which way does the roof face, and what is the G-value of the glass? On a flat unit over a south or west-facing room, a solar-control G-value around 0.3 belongs on the quote next to the U-value.
- Are the joists being doubled around the opening? The structure that was cut away has to be carried by the trimming around it.
- Who makes the Building Control notification? New and enlarged rooflights are notifiable, and we make that notification on your behalf.
A flat rooflight in a warm roof is a small piece of building physics done in the right order. Get the layers continuous through the upstand, stand the glass high enough above the water, and match the G-value to the way the roof faces, and it will be the brightest and the driest part of the room for the life of the roof. If you want the section drawn and the glass specified for your own extension, ask us for a quote with the build-up and the G-value written down, roof plane by roof plane.
Related reading
Building a rooflight upstand on a flat roof
Building a rooflight upstand on a flat roof. What it means in practice on Essex housing stock, and how we…
Can you put a skylight in a flat roof?
Can you put a skylight in a flat roof? The short answer, then the detail that actually matters.
Fixed and opening flat rooflights compared
Fixed and opening flat rooflights compared. What it means in practice on Essex housing stock, and how we approach it.
How much does a flat roof skylight cost?
How much does a flat roof skylight cost? The short answer, then the detail that actually matters.
Walk-on rooflights and where they make sense
Walk-on rooflights and where they make sense. What it means in practice on Essex housing stock, and how we approach…
What is a rooflight upstand?
What is a rooflight upstand? The short answer, then the detail that actually matters.