Thermal bridging at the rooflight upstand
Thermal bridging at the rooflight upstand. What it means in practice on Essex housing stock, and how we approach it.
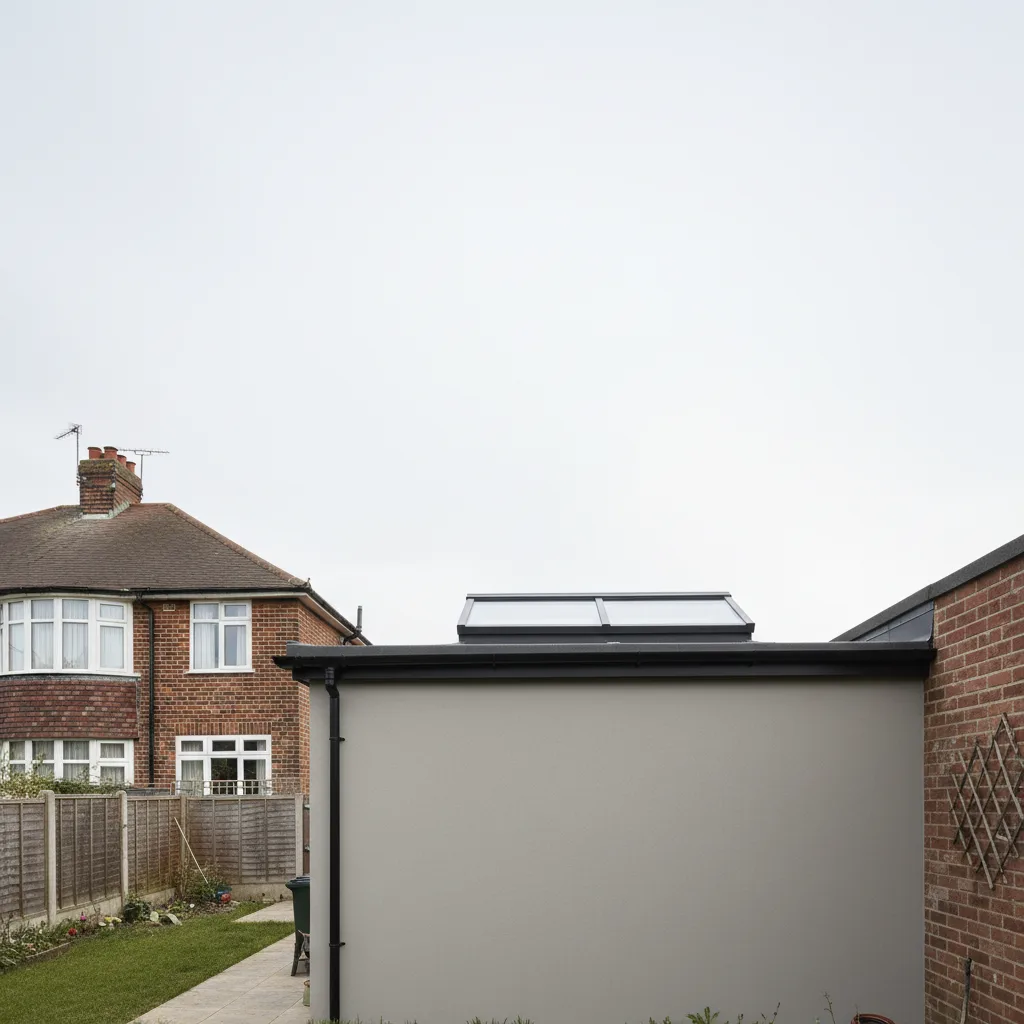
The glass gets all the attention on a quote, but the glass is rarely where a rooflight goes wrong in winter. The weak point is the kerb it sits on: the little wall of upstand that lifts the unit clear of the roof. Get that upstand cold and you have built a cold bridge straight through your insulation, and the first you will know about it is a line of black mould tracing the edge of the ceiling opening. This page explains what thermal bridging at the rooflight upstand actually is, why it forms, and how the detail is built so it does not.
What thermal bridging means at a rooflight upstand
A thermal bridge is a path through the fabric of a building where heat escapes faster than it does through the areas either side of it. The insulation in a roof works because it is continuous. Break that continuity with something more conductive, a timber, a length of metal, a gap where the insulation was never carried through, and heat takes the shortcut. The bridge does not have to be large to matter. A few centimetres of exposed timber running right around a rooflight is a surprisingly effective drain.
The upstand is where this happens on almost every flat or shallow-pitch rooflight. The unit cannot sit flat on the roof deck, because water would pond against it and run under the frame, so it is raised on a kerb. That kerb is a small vertical wall, usually 150mm tall, punching up through the warm roof build-up and out into the cold. If the kerb is built from bare timber or an uninsulated metal frame, it connects the warm inside face of your ceiling directly to the cold outside air, going around the roof insulation rather than through it.
Two numbers describe what is going on. The first is the linear thermal transmittance, written as a psi-value in watts per metre of junction per degree, W/mK. It measures the extra heat loss along the whole perimeter of the opening, over and above what the flat roof and the rooflight lose on their own. The second is the temperature factor, fRsi, a decimal that tells you how cold the inside surface gets at the worst point of the junction. Those two figures, not the glass specification, decide whether the upstand stays dry or grows mould.
What the upstand is and why it exists
On a pitched roof, a window like a roof window sits in the plane of the tiles and sheds water down the slope, so it needs no kerb. On a flat or near-flat roof, there is no slope to rely on, and the rooflight has to be lifted above the surface water. That lift is the upstand, also called the kerb. It does three jobs at once. It holds the glass clear of standing water and driven rain. It gives the roofing membrane a vertical face to turn up and seal against. And it provides the structure the rooflight frame is fixed down to.
Flat roofs are not truly flat. They are laid to a fall, usually a minimum of 1 in 80 once built, so water drifts towards an outlet rather than sitting in pools. Even so, guidance puts the top of the upstand at least 150mm above the finished roof surface at its lowest point, so that ponding, snow lying against the kerb, or a blocked outlet cannot bring the water line up to the glass seal. On a flat-roof skylight the kerb is doing real weatherproofing work, and its height is not negotiable down to nothing to make the unit look sleeker.
There are three broad ways the kerb gets built. A timber kerb, framed from treated softwood, is the traditional method and still the most common. A proprietary insulated upstand, moulded from a composite or a rigid PVC with an insulated core, comes ready-made to suit the rooflight. Or a builder’s kerb, formed in blockwork or as an extension of the roof structure and finished to match the wall. Each behaves very differently as a thermal bridge, and that is the whole point of this page.
Where the bridge actually forms
Point at a cold rooflight in January with a thermal camera and the heat loss does not glow evenly. It concentrates at particular spots, and knowing where they are tells you what a good detail has to solve.
The first is the kerb wall itself. If it is bare timber with insulation stopping at the roof deck and nothing carried up the vertical face, that timber runs from warm to cold with no interruption. Softwood conducts heat several times faster than mineral wool, so the whole perimeter becomes a continuous cool strip.
The second is the junction between the roof insulation and the base of the kerb. This is where installers most often leave a gap. The insulation in the roof build-up is butted up to the kerb but not tucked tight against it, or it is compressed and thinned at the corner, and a void opens up exactly where the two elements meet. Air moves in that void, and a ventilated gap in the middle of your insulation performs like no insulation at all.
The third is the frame of the rooflight where it clamps down onto the top of the kerb. Aluminium frames conduct heat extremely well. A frame without a thermal break, a deliberate non-conductive separation between its outer and inner faces, carries cold straight from the weathered top of the unit through to the internal reveal. Good rooflights are built with a polyamide or similar thermal break in the frame for this reason, and it is worth knowing whether the unit being quoted has one.
The fourth is the internal reveal, the plasterboard lining of the shaft between the ceiling and the underside of the glass. On a thick roof or a raised kerb, that reveal can be 300mm or more of surface, and if the insulation does not follow it up and over, the reveal becomes a cold funnel that the room’s warm, moist air washes across all day.
Condensation, mould and the temperature factor
A cold bridge on its own only costs you a little heat. What turns it into a problem you can see is condensation, and condensation is governed by the temperature factor, fRsi.
The mechanism is simple. Warm air holds moisture. Cool that air against a cold surface and it can hold less, so the excess drops out as liquid water on that surface. The colder the surface relative to the room, the sooner it happens. In a kitchen or bathroom, where cooking, kettles and showers pour moisture into the air, the humidity is high and the dew point is close to the room temperature, so even a mildly cold surface will run wet. Mould needs no standing water to start. Sustained surface humidity above about 80 per cent is enough, and that sits well below the point where you would see actual droplets.
The temperature factor puts a number on the risk. It compares the temperature of the coldest internal surface with the difference between inside and outside air. A value of 1.0 would mean the surface is as warm as the room. A value of 0.0 would mean it is as cold as the outdoors. Guidance for dwellings, set out in BRE Information Paper 1/06 and carried through Building Regulations, takes an fRsi of 0.75 as the threshold below which surface mould becomes likely in a typical home. A well-detailed, insulated upstand comfortably clears 0.75. A bare timber or unbroken metal kerb can fall to 0.65 or lower at the corners, and that is where the black line appears.
This is why chasing the glass specification alone does not settle a damp ceiling edge. You can fit the warmest triple-glazed unit on the market, with a beautiful whole-unit U-value, and still grow mould around it if the kerb it sits on is a cold bridge. The unit and the upstand are two separate thermal problems, and the upstand is the one that quietly gets left out of the conversation.
Upstand build-ups compared, with real numbers
These are industry-typical figures for common upstand constructions on a flat or shallow-pitch roof. Exact values depend on the insulation thickness, the timber size, the frame and how carefully the junction is closed on site, so read them as the shape of the difference rather than a guaranteed result for your roof. The pattern is what matters, and the pattern is stark.
| Upstand construction | Perimeter psi-value (W/mK) | Temperature factor fRsi | Condensation risk |
|---|---|---|---|
| Bare timber kerb, insulation stopped at deck | 0.45 to 0.75 | 0.55 to 0.65 | High, mould likely at corners |
| Metal frame, no thermal break, uninsulated kerb | 0.50 to 0.90 | 0.50 to 0.62 | High, cold frame runs wet |
| Timber kerb, insulated on the outer face | 0.15 to 0.25 | 0.72 to 0.78 | Borderline to acceptable |
| Timber kerb, insulation wrapped and reveal lined | 0.08 to 0.15 | 0.78 to 0.84 | Low |
| Proprietary insulated composite upstand | 0.05 to 0.10 | 0.82 to 0.90 | Low, best in class |
Read the psi-value column first. From a bare timber kerb to a proprietary insulated upstand the figure falls by roughly a factor of ten. That is the extra heat leaking around the whole perimeter of every rooflight in the roof, all winter, and on a big roof lantern the perimeter can be five or six metres of it.
Now read the fRsi column, because that is the one that decides whether you get mould. The two uninsulated rows sit below the 0.75 threshold, some of them well below it, which is another way of saying the detail is expected to grow mould in a normal kitchen. The insulated rows clear it. The jump between the second and third rows, from an uninsulated kerb to one wrapped in insulation, is not a small refinement. It is the difference between a junction that stays dry and one that does not.
One point the table cannot show is workmanship. The published psi-value assumes the insulation is actually continuous, with no gap left at the base of the kerb and no daylight showing through the corners. A perfect specification installed with a 20mm void at the junction performs like the row above it, not the row it was sold as. The detail is only as good as the closing of it, and that happens on the roof, not on the data sheet.
Detailing that breaks the bridge
Breaking a thermal bridge at the upstand is not exotic. It is a handful of disciplines applied in the right order, and it costs very little more than doing it badly. What it costs is attention.
Carry the insulation up and over
The roof insulation and the kerb insulation have to meet with no gap and no thinning. On a warm-roof build-up, that means the rigid board is dressed tight against the base of the kerb and a matching layer is taken up the outer face of the kerb to the top, so the two wrap the timber completely. The aim is a continuous thermal envelope with the kerb inside it, not a timber post standing out in the cold with insulation stopping short at its feet.
Choose a frame with a thermal break
Where the rooflight frame is aluminium, it should have a polyamide thermal break separating the cold outer face from the warm inner face. This stops the frame acting as a conductor across the top of the kerb. A proprietary insulated upstand often integrates this, arriving as a single insulated component that the glazed unit drops straight onto.
Line the internal reveal
The plasterboard shaft between the ceiling and the glass should be insulated behind, not left as a bare cold surface facing the room. On a deep roof this reveal is a large area, and lining it keeps the internal face warm enough to stay above the dew point. A splayed reveal, opened out towards the room, also throws more daylight down into the space, which is a free gain on a north-facing plane where every bit of light counts.
Control the moisture from inside
A vapour control layer on the warm side of the insulation stops humid indoor air pushing up into the build-up and condensing where you cannot see it. Paired with sensible ventilation of the room below, an opening rooflight that lets stratified warm, moist air out at the top of the room, it keeps the humidity load off the junction in the first place. Glass and kerb decide how cold the surface gets. Ventilation decides how much moisture is there to condense on it. You want both handled.
Where this bites in south Essex roofs
The stock this comes up on most is the flat or shallow-pitch rear extension, and south Essex has an enormous quantity of it. The 1930s semi belt across the patch has been extended at the back on a scale you notice from any train line, and the standard move is a knocked-through kitchen and dining space under a flat roof with a rooflight or a lantern over it. That is a kitchen, which means high humidity, sitting directly under a junction that is either detailed warm or left to grow mould. The upstand detail matters more here than almost anywhere, precisely because of what the room underneath is used for.
Older stock brings its own version. The Victorian and Edwardian terraces and villas along the cliff and through the older parts of the city often gain a flat-roofed rear addition or a loft conversion with a flat rooflight set into a small area of low-pitch roof, frequently over a bathroom or a stairwell where warm, damp air rises and collects. The kerb on those units is doing the same work in a tighter, older build-up where the original roof insulation may be thin or patchy to begin with.
The exposure adds to it. Southend faces south across the open Thames Estuary, with wind coming off the water and very little to break it along the seafront and cliff top. Wind stripping heat off a kerb makes the outer face colder and widens the gap between inside and outside, which pushes the temperature factor down at exactly the junctions that were already marginal. A detail that would just about pass on a sheltered inland roof is working harder here.
There is a warm-weather side to this too, and it is the one the business is built around. A raised kerb with a wide splayed reveal, on a south-facing plane facing that open estuary horizon, is not only a thermal-bridge question in winter. It is also funnelling a lot of high-angle summer sun into the room, which is where the glass specification and its G-value come back in. On a south plane the upstand has to be detailed warm for the winter condensation problem and glazed for solar control against the summer gain, two separate decisions on the same unit. We survey which planes face where before either one is settled, and the reasoning behind the summer half of it is set out in full on our energy-efficient installation page.
What to ask for, and what to check
You do not need to become a building physicist to keep an installer honest on this. A few questions do the work.
- “How is the upstand insulated?” The answer should describe insulation carried up the full height of the kerb and lapped with the roof insulation, or a proprietary insulated upstand. “It sits on a timber kerb” with nothing after it is an incomplete answer.
- “Does the frame have a thermal break?” On an aluminium-framed unit this should be a straight yes. If nobody can tell you, that is worth noting before you commit.
- “What temperature factor does this junction achieve?” You are listening for a number at or above 0.75. Many installers will not have it to hand, but the ones thinking about condensation at all will know what you are asking and why.
- “How is the internal reveal finished?” Insulated and lined, ideally splayed, not left as a bare cold shaft. On a deep roof this is a large surface and it decides how the finished opening looks as much as how it performs.
- “How is the insulation closed at the base of the kerb?” This is where the gap gets left. A good answer talks about butting the board tight and taping or sealing the junction so no void and no air path is left in the corner.
- “Who notifies Building Control?” New and enlarged rooflights are notifiable under the Building Regulations. Part L covers the thermal performance the upstand detail is part of, and Part K covers the safety glazing overhead. We make that notification to Southend-on-Sea City Council, or the relevant local authority for your address, as part of the installation.
The upstand is the least glamorous part of a rooflight and the part most likely to disappoint you two winters after it goes in. A cold kerb does not leak, so it never looks like a fault of the fitting. It just sweats and grows a dark line around a ceiling that was supposed to be the best thing in the room. Detailed properly, wrapped in continuous insulation with a broken thermal path and a lined reveal, it disappears from your attention entirely, which is exactly what it should do. If you want the junction detail and the glazing worked out for your own roof before you commit to anything, ask us for a specification that spells out how the upstand is built, plane by plane.
Related reading
G-value explained, and why it matters more than U-value here
G-value explained, and why it matters more than U-value here. What it means in practice on Essex housing stock, and…
What is a good G-value for a skylight?
What is a good G-value for a skylight? The short answer, then the detail that actually matters.
Solar control glazing for south-facing roofs
Solar control glazing for south-facing roofs. What it means in practice on Essex housing stock, and how we approach it.
What U-value does a rooflight need for building regulations?
What U-value does a rooflight need for building regulations? The short answer, then the detail that actually matters.
Do skylights make a room too hot?
Do skylights make a room too hot? The short answer, then the detail that actually matters.
U-values, Part L and rooflight compliance
U-values, Part L and rooflight compliance. What it means in practice on Essex housing stock, and how we approach it.